Disclaimer: In light of the ongoing aggression against Ukraine, we are committed to ensuring transparency regarding the providers in the Transform Hub so that you can make the right decisions regarding your investigative work. Please note that Social Links is partially based in Russia. Read more about Social Link’s position here.
The Maltego Team, March 24, 2022
With paper trails having turned digital, person of interest investigations have become a complex game of cat-and-mouse. Navigating such digital landscape can become challenging for law enforcement agencies and investigators alike. Simultaneously, it is becoming easier and easier for criminals and malicious actors to hide behind fake online identities.
With Maltego, investigators can quickly and easily link seemingly disparate leads and build a comprehensive map of a target person’s digital footprint. Integrated with a variety of OSINT, social intelligence, and identity data sources, Maltego is the perfect tool to quickly obtain and analyze the digital presence of a person of interest.
In this tutorial, we demonstrate how to conduct person-of-interest investigations starting with just a name or alias, using a standard personal reconnaissance process in Maltego.
Personal Recon Process for Person of Interest Investigation 🔗︎
For this tutorial, we are going to conduct a person of interest investigation based on the name (or alias) “Prabal Panjabi.” He is a friend who would like to map out and clean up his digital footprint and has asked for our help. We will attempt to find all online data around Prabal using Maltego.
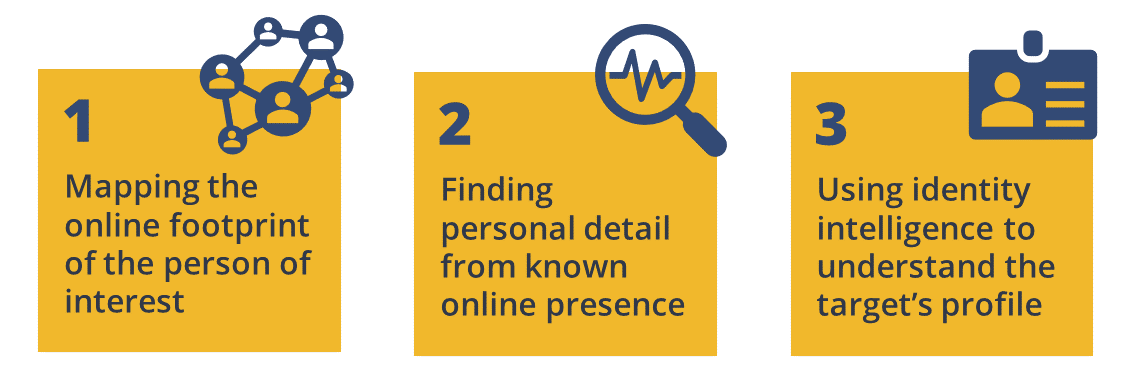
First, we will map the full online presence for the target’s name or alias by looking at relevant websites and images.
Second, we will attempt to discover any personal information such as email addresses or phone numbers from the target’s online footprint.
Finally, once we can confirm the target’s identify, we will pivot into advanced person-of-interest databases to obtain more specific identity intelligence.
Getting Started: Transforms Hub Items Required for This Person of Interest Investigation 🔗︎
We will use the following Hub items in this tutorial: Maltego Standard Transforms, Social Links CE, and Pipl. If you would like to follow along in your own Maltego Client, please ensure that these Hub items are installed.

To access Maltego Standard Transforms and Social Links CE, simply install them in the Transform Hub on your Maltego Desktop Client. You can access Pipl data in Maltego by purchasing our data subscriptions or a Pipl data connector.
Watch the Tutorial in Action 🔗︎
Watch the video demonstration of this tutorial on our YouTube channel! Read along in this article for the complete documented process.
Let’s get started!
We begin this investigation with a Phrase Entity as the starting point and change the input value from default to the target alias, “Prabal Panjabi.” To increase the accuracy of our Transform results, we use some search engine Dorking techniques and add quotation marks around the input text.
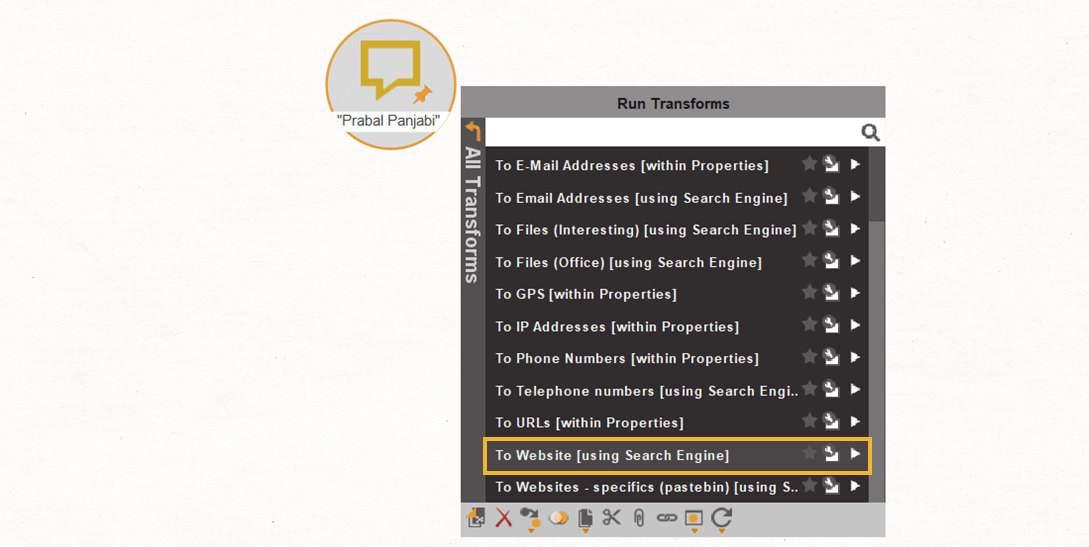
We then run the To Websites [Using Search Engine] Transform on this Phrase Entity.
This Transform queries the Bing search engine, which returns all websites mentioning our quoted search term, “Prabal Panjabi”.
Note: We have set the maximum number of results to 256 to avoid blowing up our graph for this demonstration.
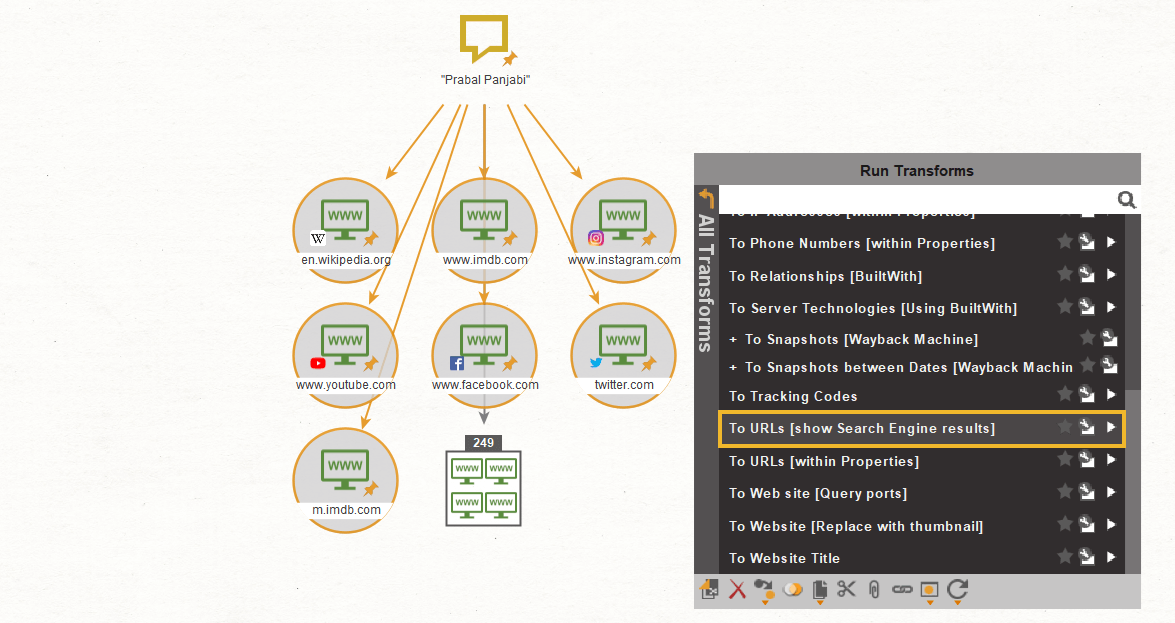
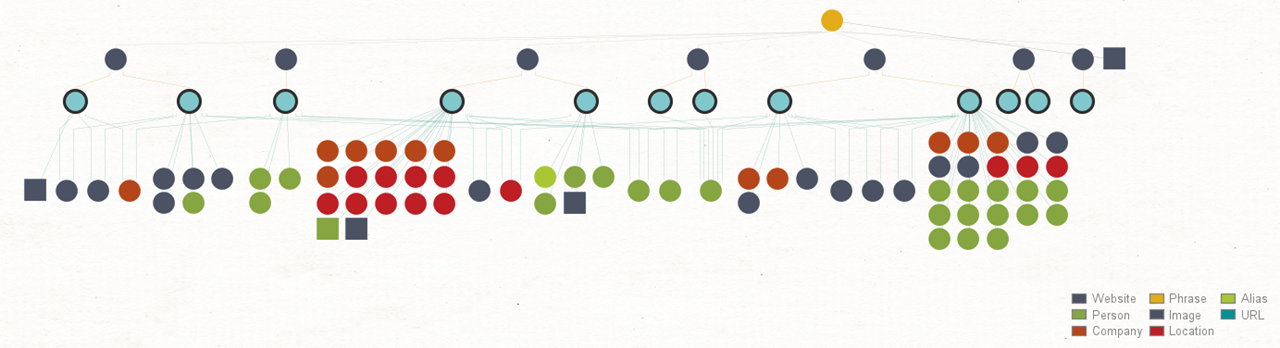
Running this Transform has returned 256 websites, including social media profiles or public pages like Facebook, Instagram, Wikipedia, Twitter, and even IMDB.
Next, we run the To URLs [Using Search Engine] Transform on these Website Entities to find the related URLs.
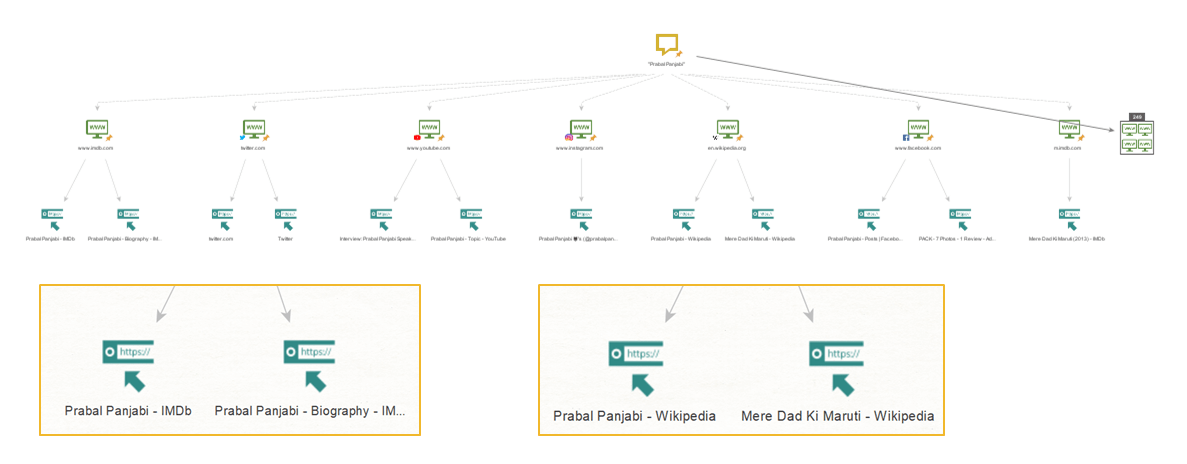
From the returned URL Entities, it seems that our friend Prabal is an actor in the Bollywood film industry. To verify this, we need more information.
We can obtain information from these URLs in two ways:
- First, we run the To Entities [IBM Watson] Transform, which will extract Entities like organizations, locations, email addresses, people, and images that are found on the webpages.
- Second, we run the To Images [Found on web page] Transform, which finds and returns all images on the webpages.
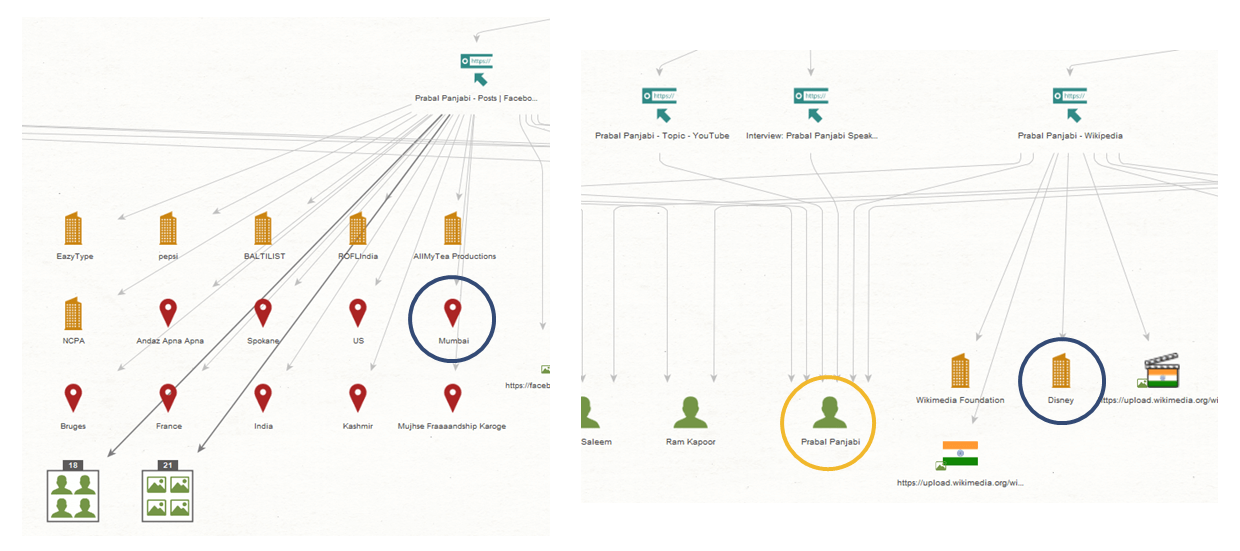
From these Transforms results, we have already made a few interesting discoveries. For example, the Facebook profile pins our target’s location in Mumbai and associates a few artists with this person. The Wikipedia page pins the target in Chandigarh, another city in India, and associates Disney with this person.
The Transforms has also returned a number of images that might help us identify the target.
The most interesting result we have uncovered thus far is that the Prabal Panjabi Person Entity is shared by all our website sources.
Next, let’s see if we can pivot from this Person Entity to finding more personal details.
Step 2: Finding Personal Information from Known Online Presence of the Target 🔗︎
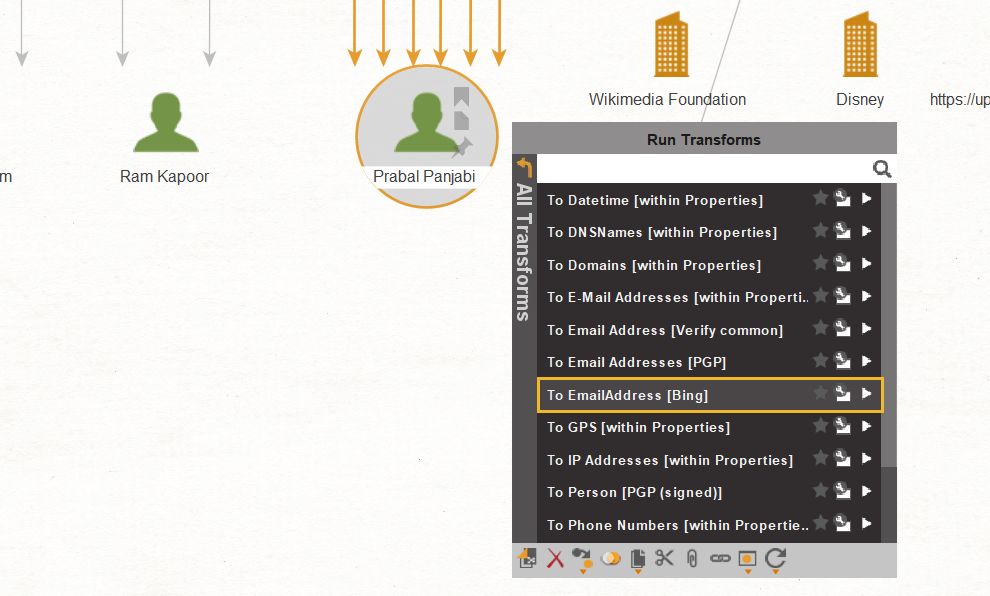
First, we run the To EmailAddress [Bing] Transform on the Person Entity. We could specify an email domain in the pop-up window if we already know which email services this person is using, but in our case, we leave it blank to find as many results as possible.
The Transforms have returned a number of email addresses, including one that matches our target’s alias. This could legitimately be the email address of our target.
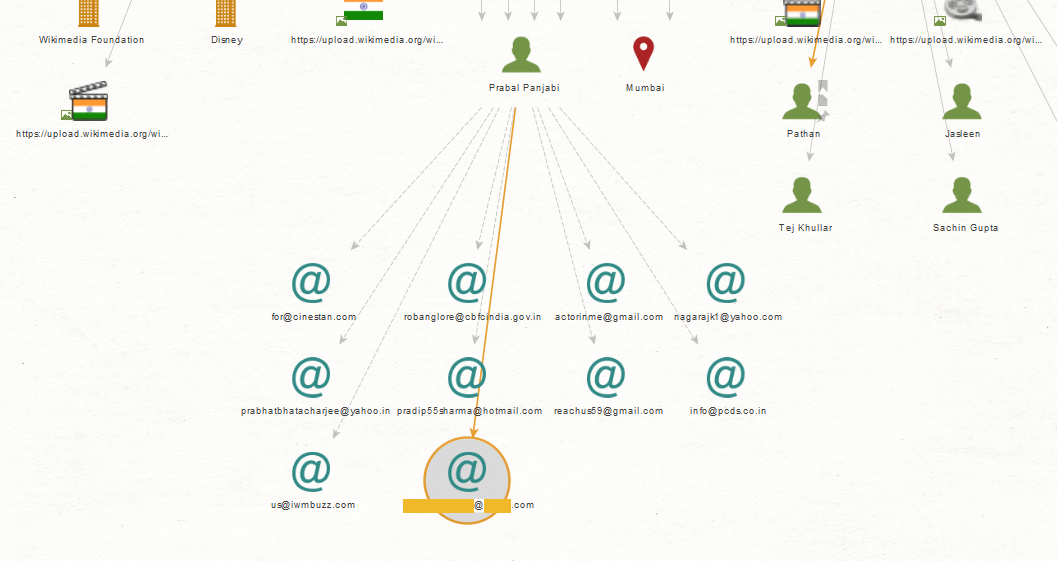
Note: To avoid publicly disclosing private details of our friend, we have masked some information presented in the graphs.
We can verify the email address by running the Verify and fraud-check email address [IPQS] Transform. The result will be populated in the Detail View to the right.

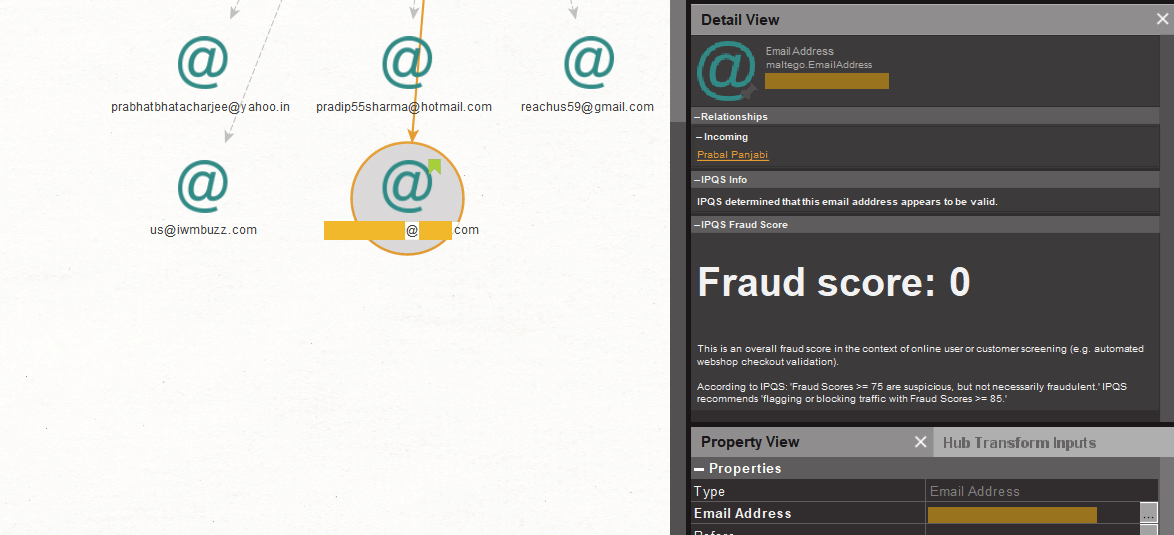
The IPQS Transform results tell us that the email address does exist and has not been involved in fraud activities. It is now safe to assume that this is indeed a personal email address.
Pivoting from An Email Address to Social Accounts Investigation 🔗︎
So far, we have been running this investigation using Maltego Standard Transforms, which are shipped for free with our software. However, Maltego also has a wide variety of third-party data integrations that that can enrich various investigations.
From this email address, we can pivot into social accounts investigation to find the social footprints of our target using the Social Links CE data integration.
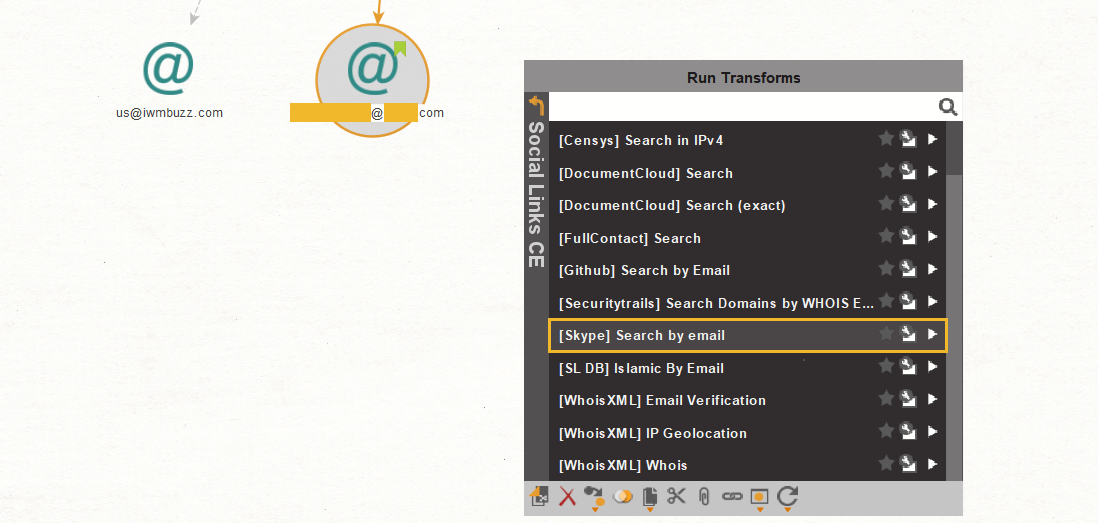
We run the [Skype] Search by email Transform to find Skype accounts associated with this email. We then run the [Skype] User Details Transform to extract available information of this account.
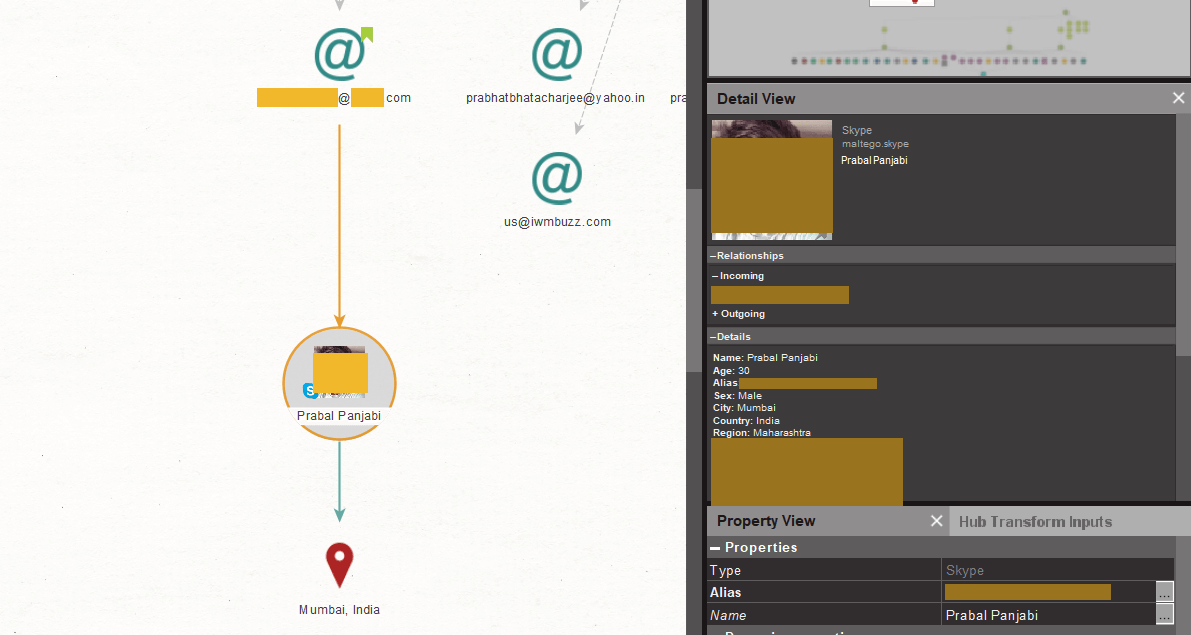
We have now discovered the Skype account of Prabal Panjabi, who is a 30-year-old male living in Mumbai, India. We also have a picture of him, which will make identifying relevant leads much easier.
Note: To avoid publicly disclosing private details of our friend, we have masked some information presented in the graphs.
Step 3: Diving into Advanced Identity Intelligence to Understand the Target’s Real-life Profile 🔗︎
We can now take our findings and pivot from here using Pipl, the largest identity database in the world. Querying the Pipl database may help us find the real-life identity of our target and understand the person’s current profile as well as their historical background.
Pipl Identity Database and How to Query it Using Maltego 🔗︎
Pipl Transforms in Maltego take an input such as a name, email address, phone number, and others and search within their database to find matching person profiles. These are returned to a Maltego graph as Person Entities. From a Pipl Person Entity, we can further query the database to discover other personal information such as career history, associated persons, hobbies, and more.
A Person of Interest Investigation using Pipl Transforms 🔗︎
We start with the Prabal Panjabi Person Entity and run the Search Person [Pipl] Transform.
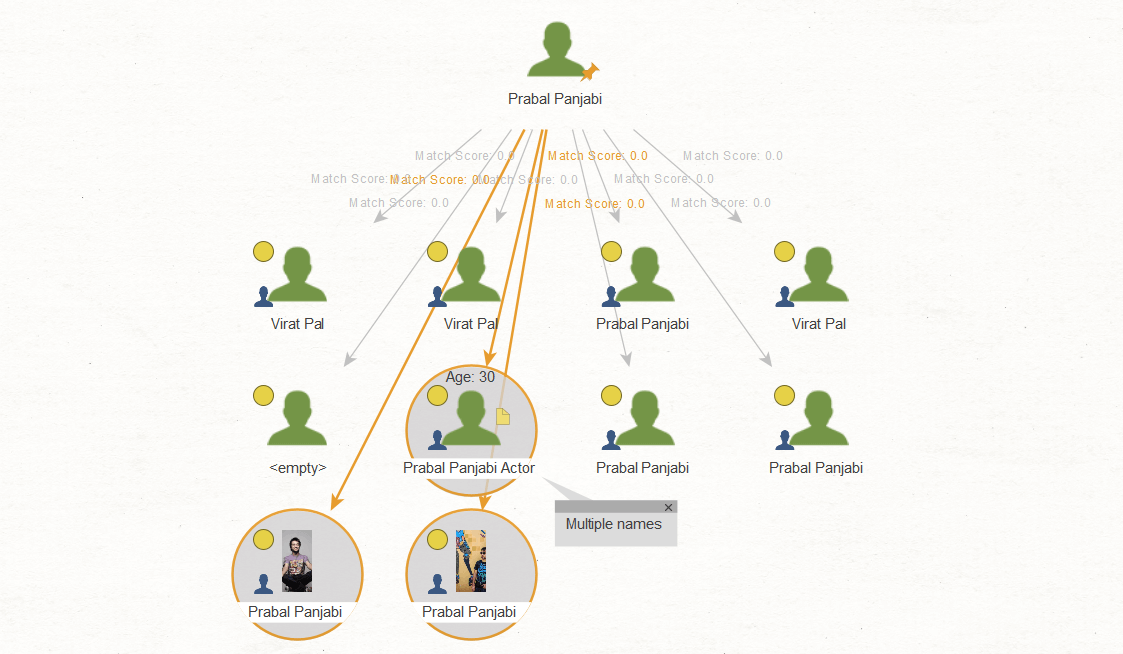
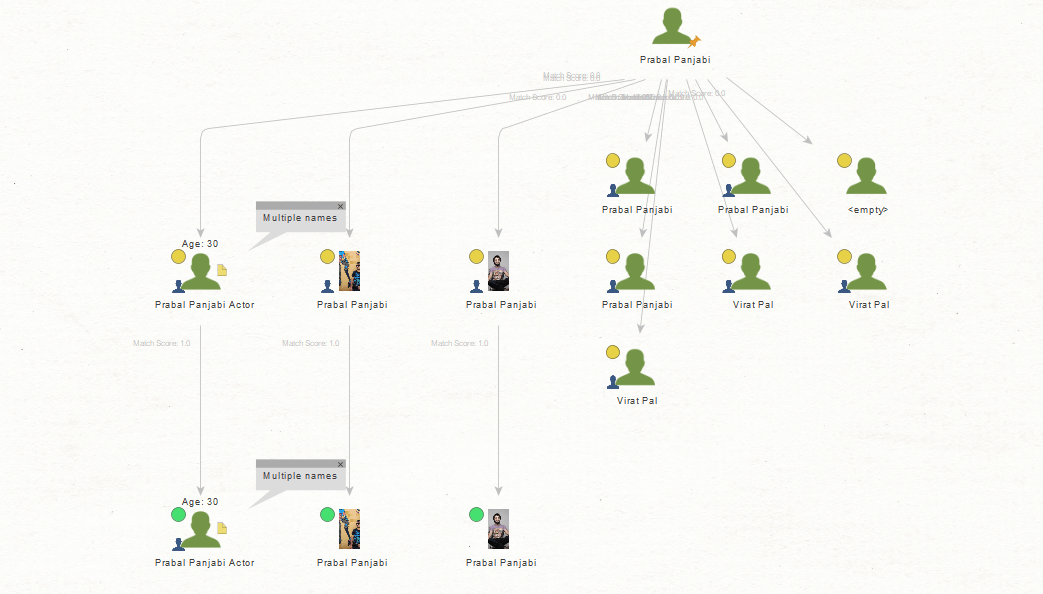
The Transform has returned a few Pipl Possible Person Entities with orange dot overlays. These are persons stored in the Pipl database that might be a match to our target.
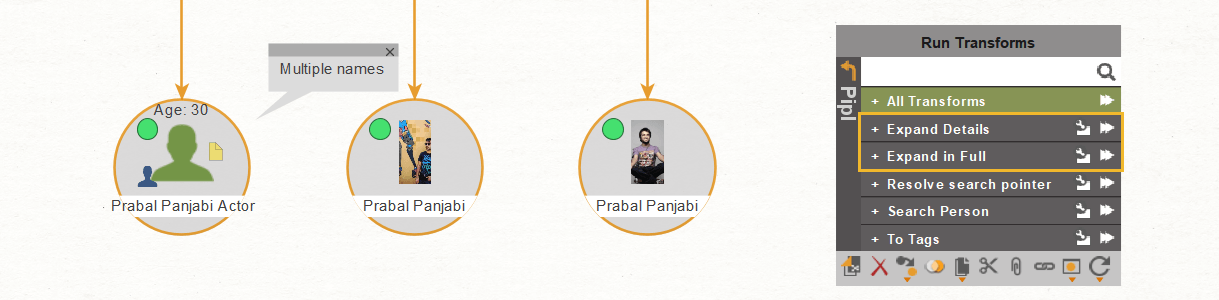
We know that our target is 30 years old and we have a Skype profile picture of him. This helps us narrow our focus to three of the Possible Person Entities returned.
We select all three and run the Resolve search pointer [Pipl] Transform, which resolves the Possible Person Entities into Pipl Person Entities (with green dot overlays) that are an exact match.
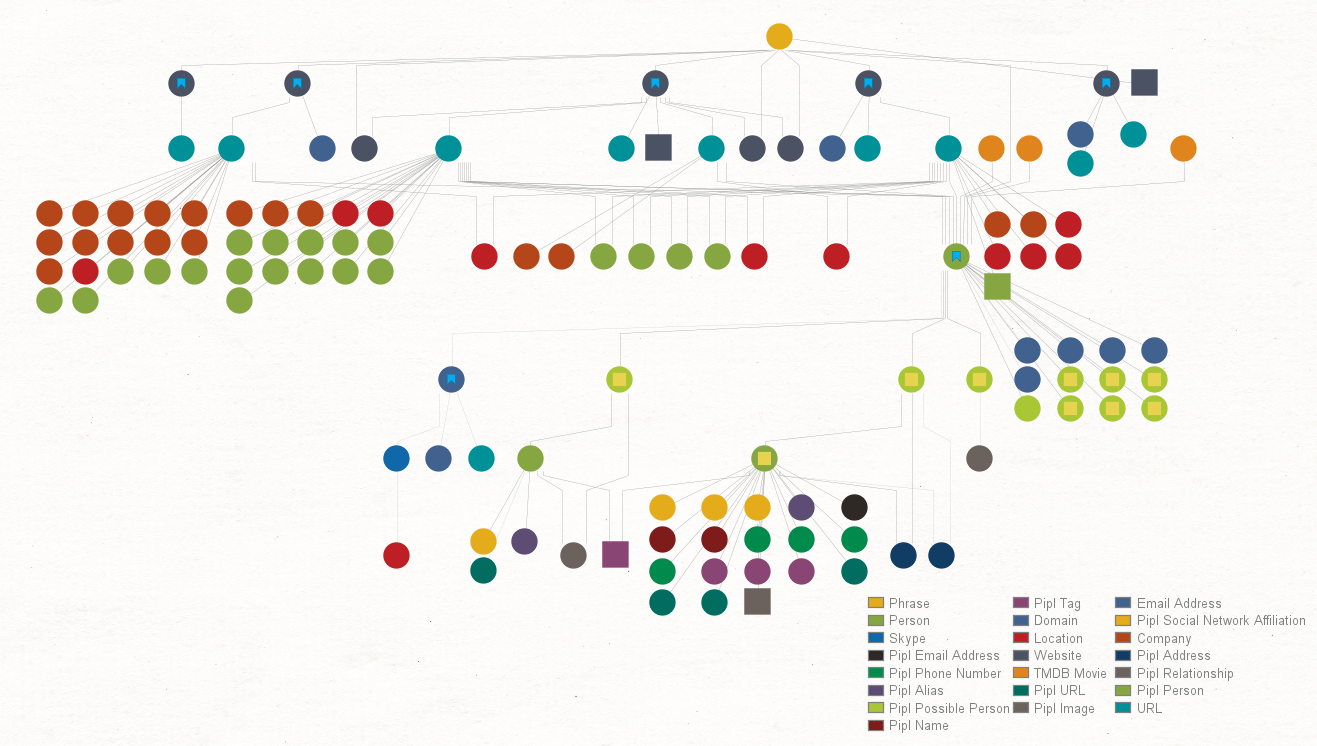
To see whether these actually represent our target person, we run the Expand in Full and Expand in Detail Transform Sets. These Transforms will return all information for these Person Entities stored in the Pipl database.
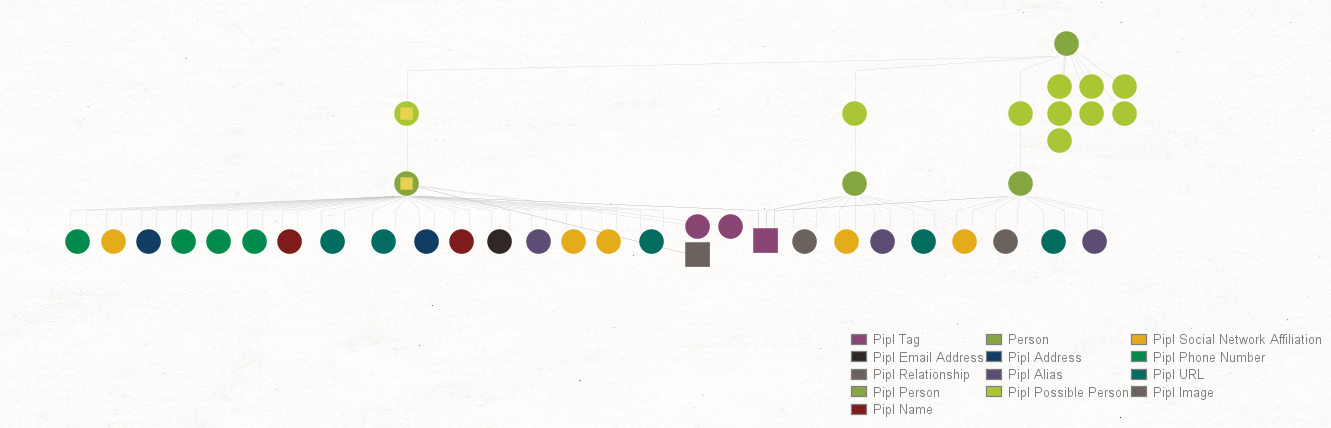
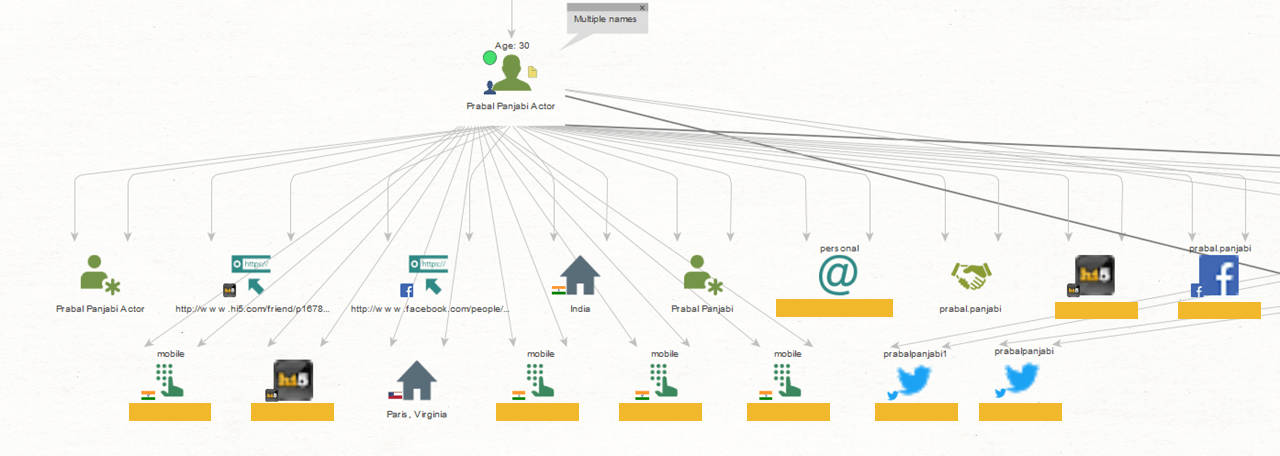
The two Transforms have returned a host of information ranging from physical addresses, email addresses, phone numbers, social media accounts, and some Pipl Tag Entities. Since most of the results are shared between the three Pipl Person Entities, we can be sure that all three Person Entities are of the same identity.
Let’s take a closer look at who Prabal Panjabi is.
Note: To avoid publicly disclosing private details of our friend, we have masked some information presented in the graphs.
The email address returned by the Pipl Transforms matches the email address we discovered previously, hereby confirming that our investigation results are accurate.
According to the addresses, Prabal Panjabi seems to have lived in both India and Virginia, USA. There are a few phone numbers that we could pivot further from. We also have a few Twitter accounts related to our target.
What could also prove very interesting are the Pipl Tag Entities. These Entities represent the hobbies, interests, and other notable information about Prabal Panjabi.

For example, going down the list, we can see that Prabal Panjabi seems to have shown interest in a few movies and series such as How I Met Your Mother, Kungfu Panda, Batman, The Hangover, and Prison Break. He also seem to like watermelons.
While these particular interests are harmless, little nuggets of information like these from a person’s past (or present) can help us to glean a complete picture of, and get closer to a person and his or her interests.
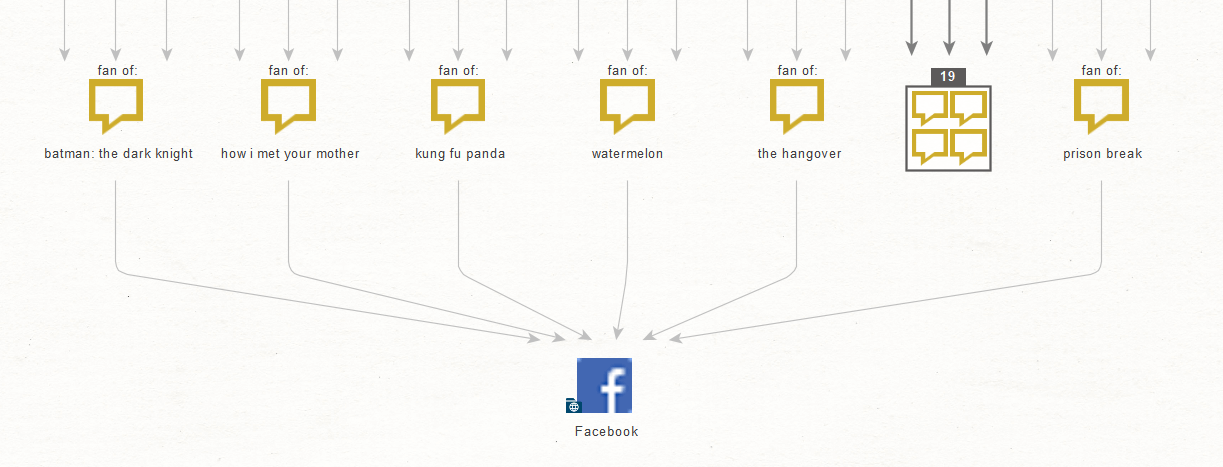
If we want to know the source of such information, we can select these Tag Entities and run the To Source Origin [Pipl] Transform. Based on the results, we know that Pipl collected this information from Prabal Panjabi’s Facebook activities.
And that wraps up our person-of-interest investigation demo.
Next Steps: Enrich the Person of Interest Investigation with More OSINT Data 🔗︎
This is an example of a personal recon process investigators can perform using Maltego.
Recap of the Person of Interest Investigation Process 🔗︎
To quickly recap, we started with a name and found websites that mention the name. From these webpages, we retrieved possible location information and the personal identity of our target.
Next, we discovered an email address which in turn led to a Skype account which provided us with a picture of our target person and disclosed more personal details such as age.
Finally, we pivoted into Pipl’s identity database to obtain more detailed information for the person-of-interest.
Pivoting to Other OSINT Data 🔗︎
From the different Entities returned to our graph, we could of course investigate deeper and wider, such as pivoting into reverse image search or conducting a network footprint using the email address. This would help us to map an extensive online and infrastructure network of the person of interest.
If we are conducting the person of interest investigation for fraud, we could also look at the target’s business relationships using the OpenCorporates and WhoisXML data integrations. We showed such a use case in our joint webinar with Pipl.
The purpose of your investigation will help you to decide what next steps to take.
We hope you enjoyed this demonstration of a person of interest investigation. Don’t forget to follow us on Twitter and LinkedIn and sign up to our email newsletter to stay updated on latest tutorials, use cases, and webinars!
Happy investigating!